
Crafting a Windows 11 Installation Medium: A Comprehensive Guide to USB Tool Creation
Related Articles: Crafting a Windows 11 Installation Medium: A Comprehensive Guide to USB Tool Creation
Introduction
With great pleasure, we will explore the intriguing topic related to Crafting a Windows 11 Installation Medium: A Comprehensive Guide to USB Tool Creation. Let’s weave interesting information and offer fresh perspectives to the readers.
Table of Content
- 1 Related Articles: Crafting a Windows 11 Installation Medium: A Comprehensive Guide to USB Tool Creation
- 2 Introduction
- 3 Crafting a Windows 11 Installation Medium: A Comprehensive Guide to USB Tool Creation
- 3.1 Understanding the Importance of a Bootable USB Drive
- 3.2 Essential Tools for Creating a Windows 11 USB Tool
- 3.3 Step-by-Step Guide to Creating a Windows 11 USB Tool
- 3.4 Frequently Asked Questions about Windows 11 USB Tool Creation
- 3.5 Tips for Creating a Windows 11 USB Tool
- 3.6 Conclusion
- 4 Closure
Crafting a Windows 11 Installation Medium: A Comprehensive Guide to USB Tool Creation
The Windows 11 operating system, with its refined user interface, enhanced security features, and improved performance, has garnered significant attention. However, installing this operating system necessitates a bootable installation medium. This is where the Windows 11 USB tool creation process comes into play, enabling users to create a bootable USB drive containing the necessary files to install Windows 11 on a compatible computer. This guide will delve into the intricacies of this process, outlining the steps involved, the tools required, and the advantages of creating a Windows 11 USB tool.
Understanding the Importance of a Bootable USB Drive
A bootable USB drive serves as a portable platform for installing Windows 11. It contains the essential installation files, drivers, and system components, allowing the user to bypass the need for a physical DVD or CD. This approach offers several advantages:
- Convenience: USB drives are readily available, compact, and easily transportable, making them a practical solution for installing Windows 11 on multiple computers.
- Flexibility: The ability to boot from a USB drive provides flexibility in installation scenarios, especially when dealing with older computers or systems without optical drives.
- Efficiency: The process of creating a bootable USB drive is relatively straightforward and can be completed within a reasonable timeframe.
Essential Tools for Creating a Windows 11 USB Tool
Before embarking on the process of creating a Windows 11 USB tool, it is crucial to gather the necessary tools:
- A Windows 11 ISO File: This is the core component of the installation process, containing the entire operating system files. Microsoft provides official downloads for the Windows 11 ISO file on its website.
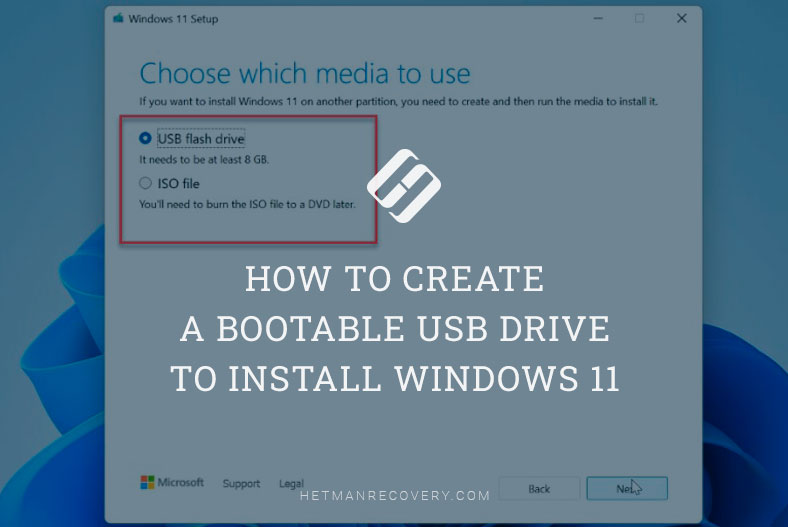
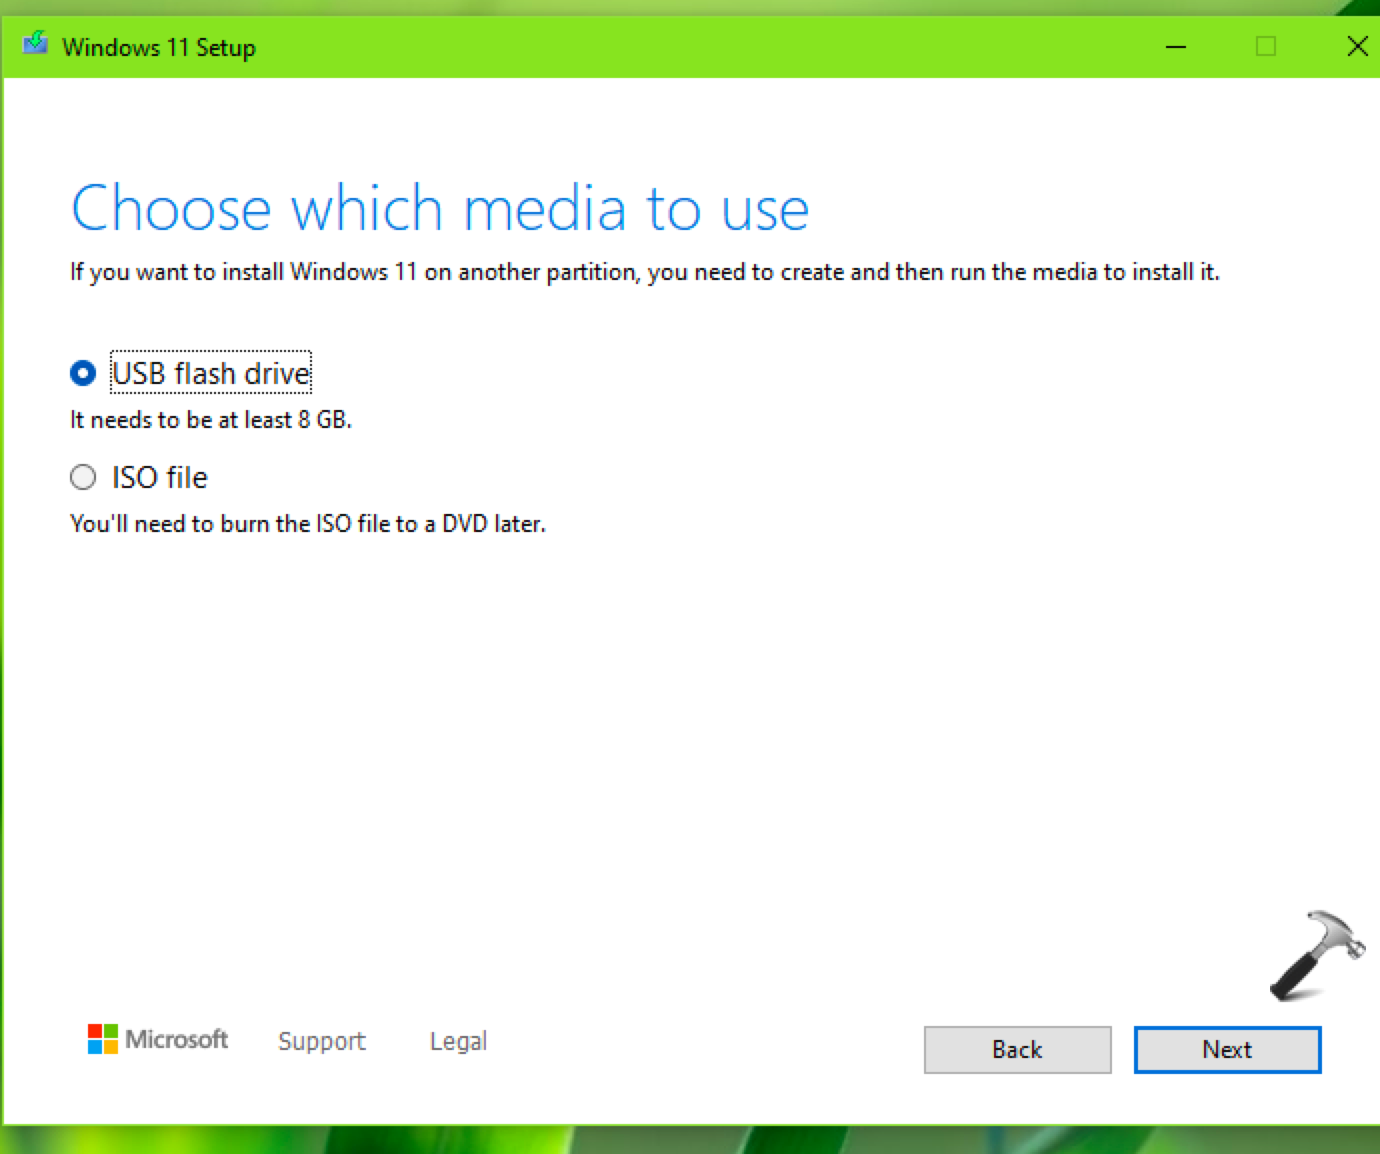
- A USB Drive: Select a USB drive with sufficient storage capacity to accommodate the Windows 11 installation files. The minimum recommended storage capacity is 8 GB.
- A Computer with a Working Operating System: This computer will be used to create the bootable USB drive. The operating system on this computer can be Windows 10, Windows 11, or even a Linux distribution.
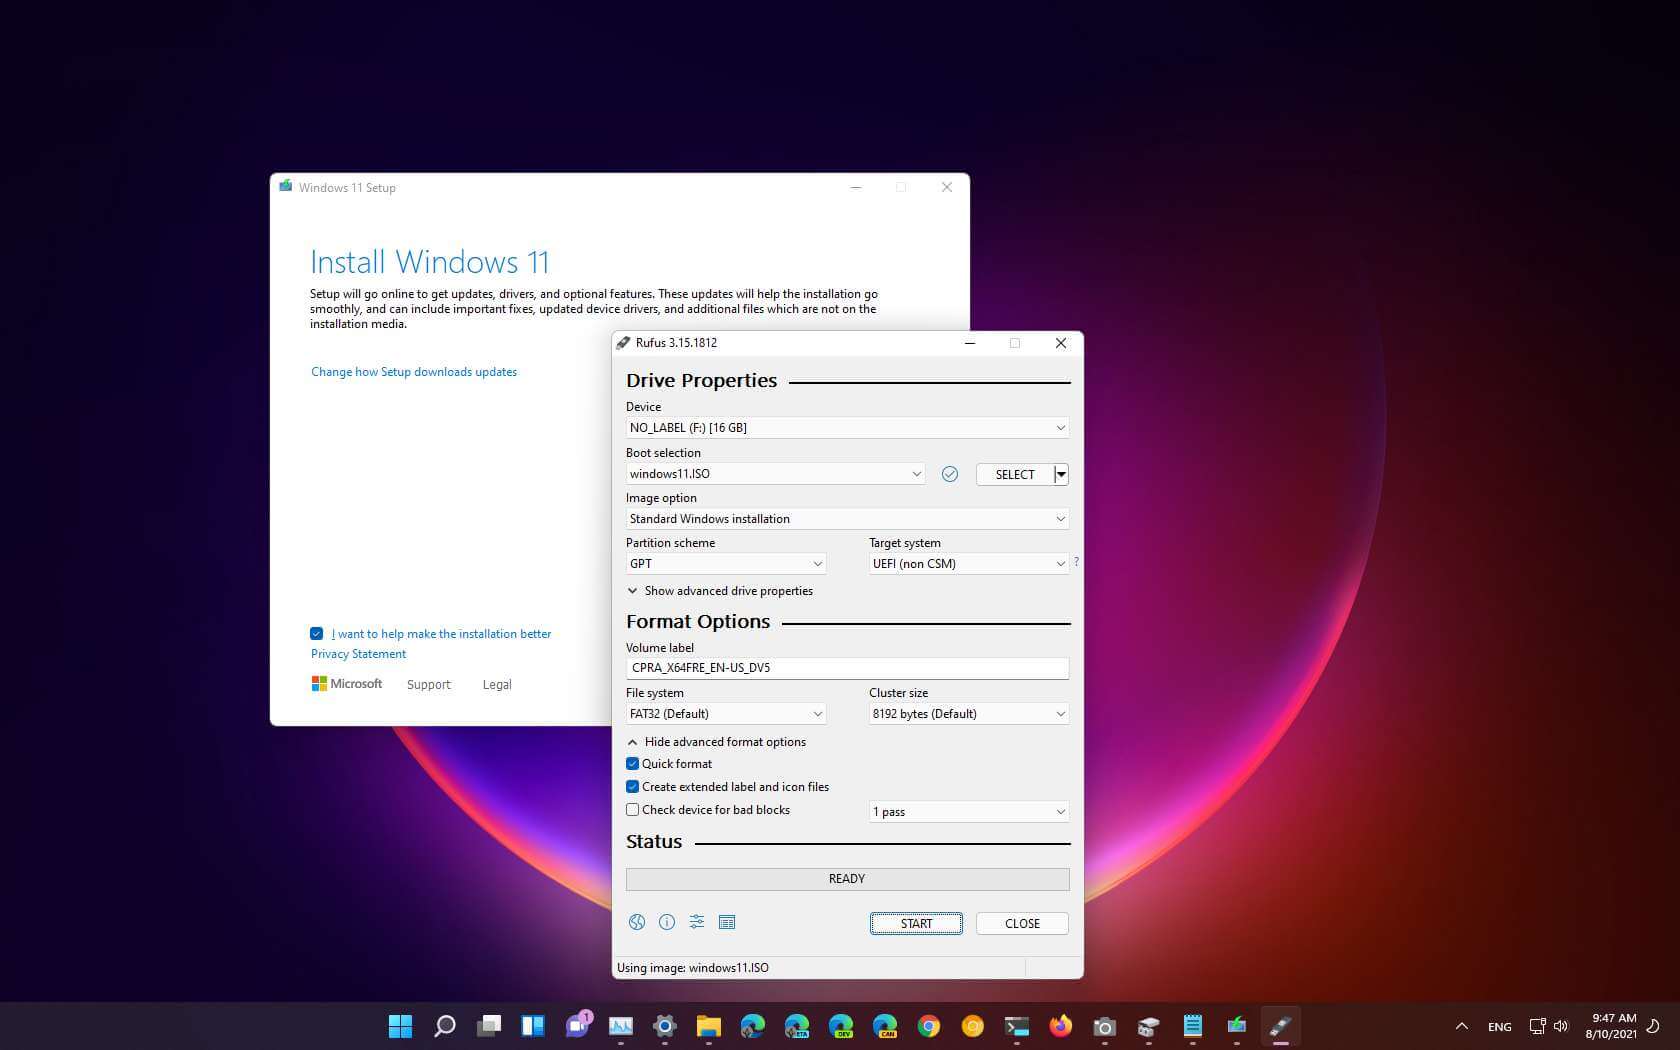
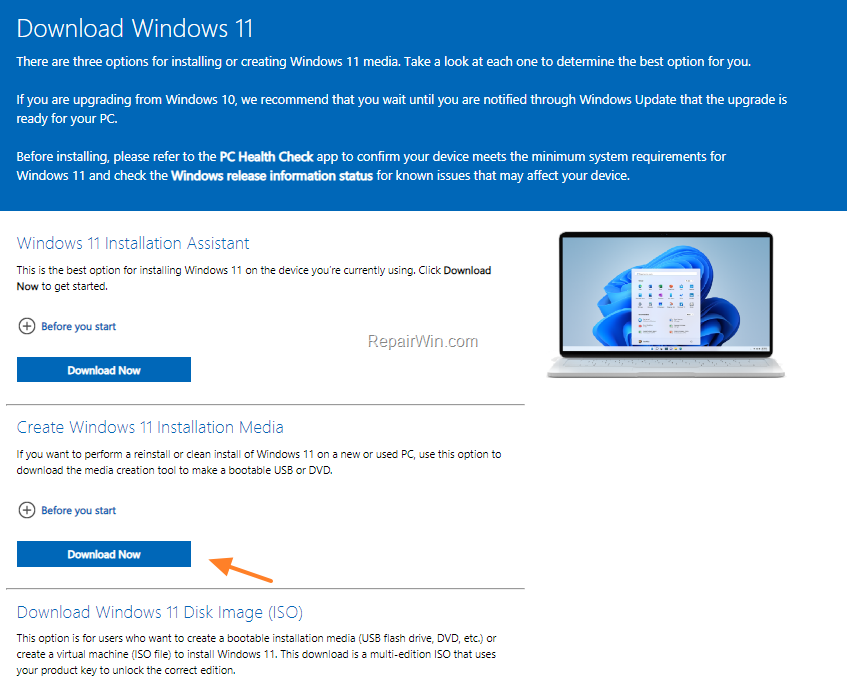
- The Windows 11 USB Tool: Microsoft provides a dedicated tool for creating bootable USB drives for Windows 11. This tool, known as the "Media Creation Tool," can be downloaded directly from the official Microsoft website.
Step-by-Step Guide to Creating a Windows 11 USB Tool
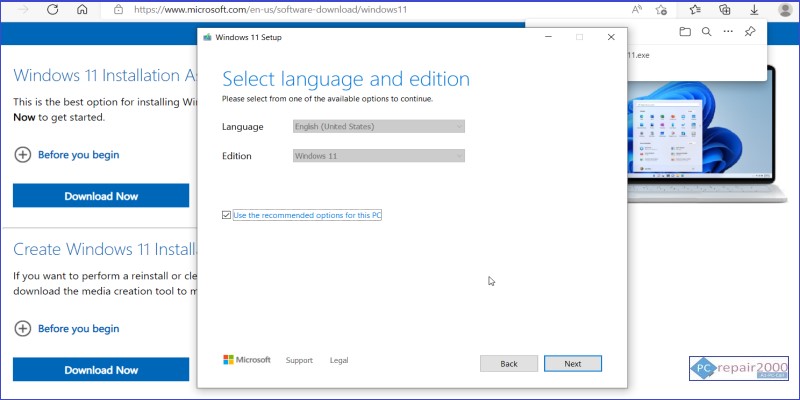
- Download the Windows 11 ISO File: Visit the official Microsoft website and download the Windows 11 ISO file corresponding to your desired language and edition.
- Download the Media Creation Tool: Access the official Microsoft website and download the "Media Creation Tool." This tool is specifically designed to create bootable USB drives for Windows 11.
- Launch the Media Creation Tool: Run the downloaded Media Creation Tool on your computer.
- Accept the License Terms: Read and accept the license terms presented by the tool.
- Choose the "Create installation media for another PC" option: This option allows you to create a bootable USB drive that can be used to install Windows 11 on another computer.
- Select the language, edition, and architecture of Windows 11: Choose the desired language, edition (Home, Pro, etc.), and architecture (32-bit or 64-bit) for your Windows 11 installation.
- Connect the USB drive: Connect the USB drive to your computer. Ensure that the USB drive is formatted as NTFS.
- Select the USB drive as the destination: The Media Creation Tool will display a list of connected USB drives. Choose the USB drive you want to use for the installation media.
- Start the creation process: The tool will download the necessary files and create the bootable USB drive. This process may take some time depending on your internet connection speed.
- Verify the USB drive: Once the process is complete, verify that the USB drive is bootable by restarting your computer and accessing the BIOS settings. Ensure that the USB drive is selected as the boot priority.
Frequently Asked Questions about Windows 11 USB Tool Creation
Q: What if my USB drive is not formatted as NTFS?
A: The Media Creation Tool will automatically format the USB drive to NTFS if it is not already formatted as such. However, it is recommended to format the USB drive to NTFS beforehand to avoid any potential errors.
Q: Can I use a USB drive that is already in use?
A: It is strongly advised to use a blank USB drive for the installation process. The Media Creation Tool will format the USB drive, deleting all existing data.
Q: What happens to the data on my USB drive during the creation process?
A: All data on the USB drive will be deleted during the formatting process. It is essential to back up any important data before proceeding.
Q: Can I create a bootable USB drive for Windows 11 using a different tool?
A: While other tools may be available, the official Media Creation Tool from Microsoft is the recommended method for creating a bootable USB drive for Windows 11. This tool ensures compatibility and optimizes the installation process.
Q: How do I use the bootable USB drive to install Windows 11?
A: Once you have created the bootable USB drive, you can use it to install Windows 11 on a compatible computer by booting from the USB drive and following the on-screen instructions.
Tips for Creating a Windows 11 USB Tool
- Use a high-quality USB drive: Invest in a reputable USB drive with a reliable brand to ensure a smooth and error-free installation process.
- Back up your data: Before starting the creation process, back up any important data on your computer and USB drive.
- Check for compatibility: Ensure that your computer meets the minimum system requirements for Windows 11.
- Download the latest version of the Media Creation Tool: Always download the latest version of the Media Creation Tool to benefit from any bug fixes or improvements.
- Use a stable internet connection: A stable internet connection is crucial for downloading the necessary files for the bootable USB drive.
Conclusion
Creating a Windows 11 USB tool is an essential step in the process of installing Windows 11 on a computer. This guide has provided a comprehensive overview of the process, highlighting the importance of a bootable USB drive, the necessary tools, and step-by-step instructions. By following these guidelines, users can confidently create a bootable USB drive for Windows 11, ensuring a smooth and successful installation experience. Remember to always download the official Media Creation Tool from Microsoft and back up any crucial data before proceeding.


Closure
Thus, we hope this article has provided valuable insights into Crafting a Windows 11 Installation Medium: A Comprehensive Guide to USB Tool Creation. We appreciate your attention to our article. See you in our next article!