
Navigating the Labyrinth: When Windows 11 Fails to Boot into BIOS
Related Articles: Navigating the Labyrinth: When Windows 11 Fails to Boot into BIOS
Introduction
With enthusiasm, let’s navigate through the intriguing topic related to Navigating the Labyrinth: When Windows 11 Fails to Boot into BIOS. Let’s weave interesting information and offer fresh perspectives to the readers.
Table of Content
Navigating the Labyrinth: When Windows 11 Fails to Boot into BIOS
The ability to access the BIOS (Basic Input/Output System) is crucial for various computer maintenance tasks. It allows users to modify boot order, configure hardware settings, and even perform system diagnostics. However, situations arise where Windows 11 fails to initiate the expected BIOS boot sequence, leaving users stranded and perplexed. This article delves into the intricacies of this issue, providing a comprehensive understanding of its causes, troubleshooting methods, and potential solutions.
Understanding the BIOS and its Significance
The BIOS, often referred to as UEFI (Unified Extensible Firmware Interface) in modern systems, serves as the foundational software that bridges the gap between hardware components and the operating system. It performs essential tasks during the boot process, including:
- Power-on Self-Test (POST): This initial stage checks the hardware components for functionality and reports any errors.
- Boot Device Selection: The BIOS determines the boot order, deciding which storage device (hard drive, SSD, etc.) the system will attempt to boot from.
- Loading the Operating System: Once a bootable device is identified, the BIOS transfers control to the operating system’s boot loader, initiating the operating system startup.
Causes of Windows 11 Failing to Boot into BIOS
The inability to access the BIOS during Windows 11 startup can stem from various factors, each requiring a specific troubleshooting approach:
1. Incorrect Boot Order: The BIOS might be configured to prioritize a different boot device, preventing access to the BIOS setup.
2. Disabled BIOS Access: The system’s BIOS settings might have been modified to disable access to the BIOS setup, potentially as a security measure or due to accidental configuration changes.
3. Hardware Malfunctions: Faulty hardware components, including the motherboard, RAM, or storage devices, can disrupt the boot process and hinder BIOS access.
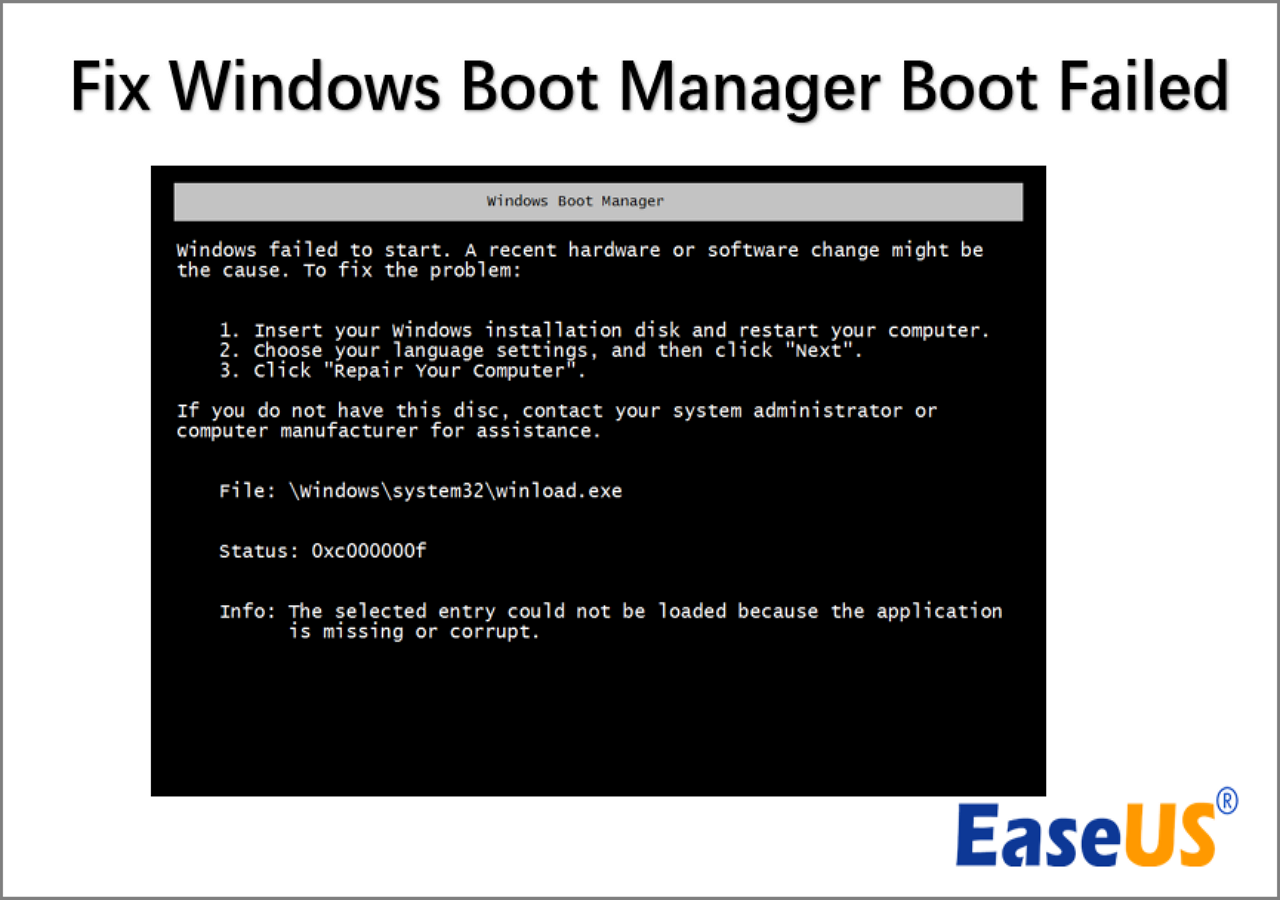
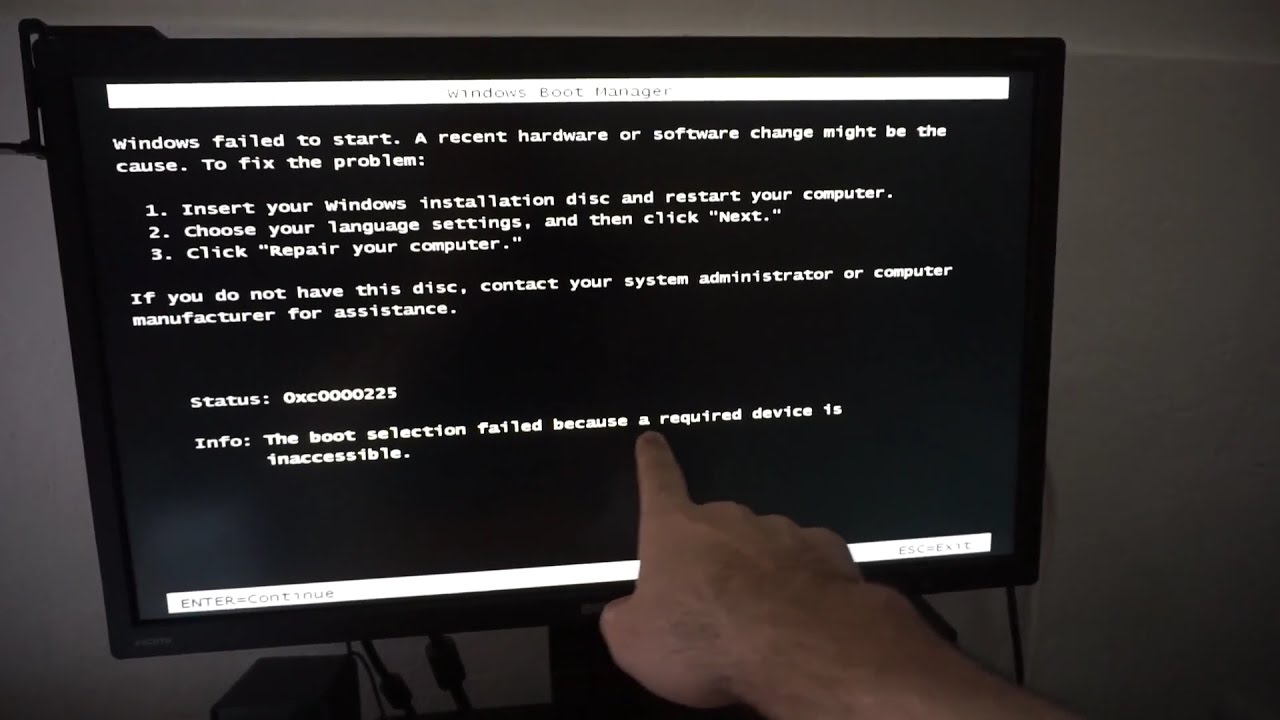
4. Operating System Issues: Corrupted boot files or system errors can interfere with the normal boot sequence, preventing the system from reaching the BIOS setup.
5. BIOS Updates and Configuration Changes: Recent BIOS updates or accidental configuration changes can sometimes lead to unexpected boot behavior, including the inability to access the BIOS.
6. External Devices: Connected external devices, such as USB drives or external hard drives, can interfere with the boot process and prevent access to the BIOS.
Troubleshooting Strategies: A Step-by-Step Approach
Addressing the issue of Windows 11 failing to boot into the BIOS requires a methodical approach, starting with simple troubleshooting steps and gradually progressing to more advanced solutions:
1. Restart the Computer and Access BIOS Setup:
- Power off the computer completely.
- Disconnect any unnecessary external devices.
- Press and hold the power button for a few seconds to fully discharge any residual power.
- Power on the computer and repeatedly press the designated BIOS access key (often F2, F10, Del, or Esc) during the initial boot sequence.
- If the BIOS setup screen appears, you have successfully accessed it. If not, proceed to the next step.
2. Check the Boot Order:
- Within the BIOS setup, navigate to the "Boot" or "Boot Order" section.
- Ensure that the desired boot device (usually the hard drive or SSD containing the operating system) is listed as the first boot option.
- If necessary, adjust the boot order to prioritize the correct device.
- Save the changes and exit the BIOS setup.
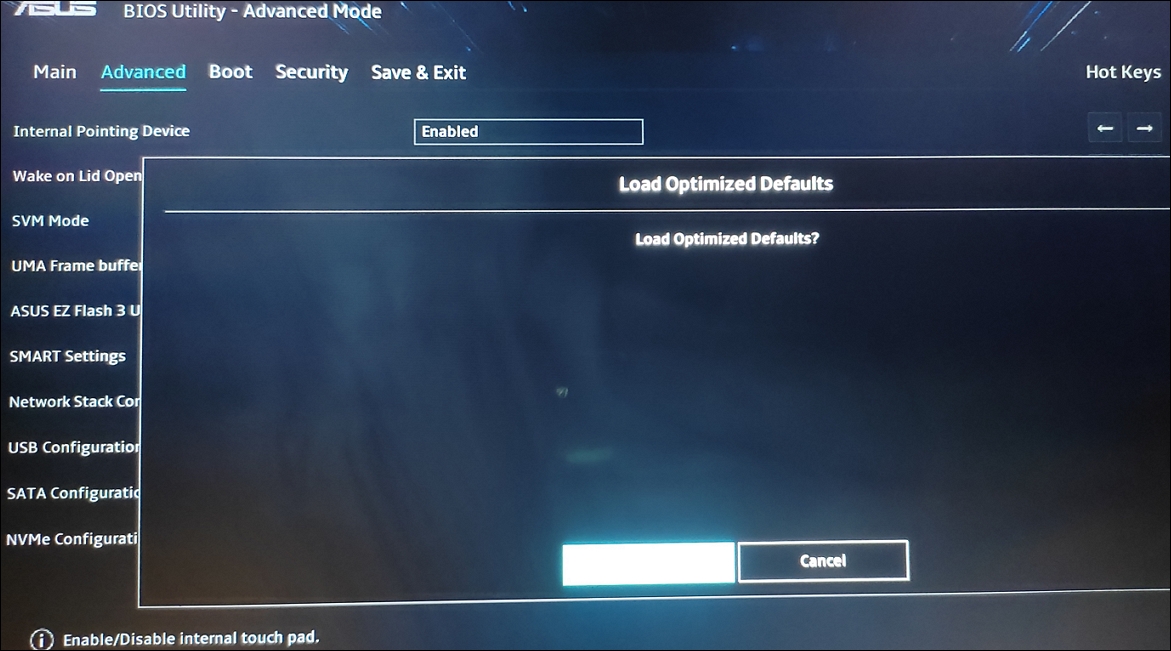
3. Enable BIOS Access:
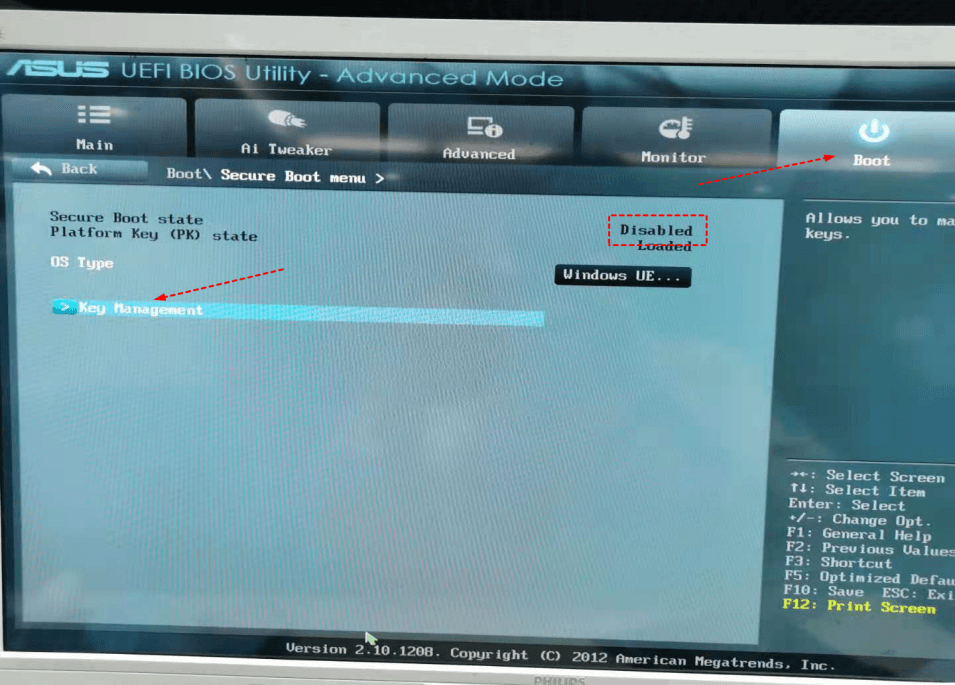
- In the BIOS setup, search for settings related to "Boot Menu," "Boot Options," or "Secure Boot."
- Ensure that the "Boot Menu" or "Boot Options" are enabled, allowing you to access the BIOS setup during startup.
- Disable "Secure Boot" if it is enabled. Secure Boot is a security feature that can sometimes interfere with BIOS access.
- Save the changes and exit the BIOS setup.
4. Perform a System Reset:
- If the above steps fail, a system reset might be necessary.
- This process will reset your computer to its factory settings, removing any installed software and user data.
- Before proceeding, back up any essential data to an external storage device.
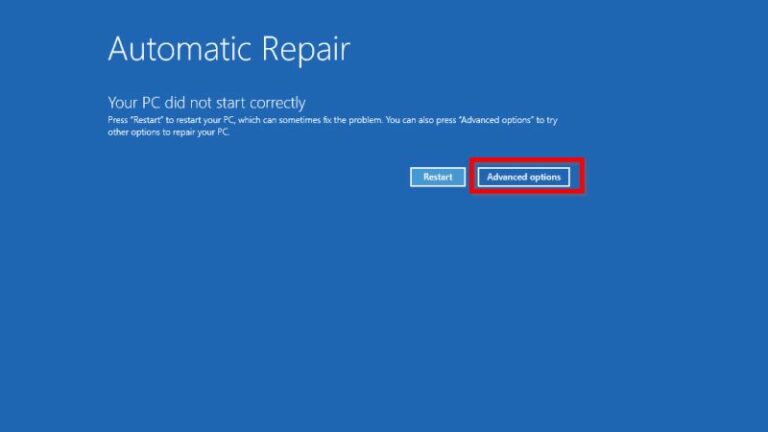
- Access the system’s recovery options (usually by pressing F11 or F12 during startup) and choose the "Reset PC" option.
- Follow the on-screen instructions to complete the reset process.
5. Run a Hardware Diagnostic:
- To identify hardware malfunctions, run a hardware diagnostic test.
- Most computer manufacturers provide diagnostic tools on their websites or pre-installed on the system.
- Run the diagnostic test and carefully review the results. Any identified errors should be addressed accordingly.
6. Seek Professional Assistance:
- If the issue persists despite thorough troubleshooting, consider seeking professional assistance from a qualified technician.
- A technician can diagnose the problem more effectively and provide specialized solutions.
FAQs: Addressing Common Queries
Q: What if the computer doesn’t even power on?
A: If the computer fails to power on at all, the issue might be related to a faulty power supply, motherboard, or other critical hardware components. Contact a qualified technician for diagnosis and repair.
Q: Can I access the BIOS using a USB drive?
A: While some systems allow booting from a USB drive, accessing the BIOS directly from a USB drive is not typically possible. You need to use the designated BIOS access key during the initial boot sequence.
Q: Will resetting the BIOS settings fix the problem?
A: Resetting the BIOS to its default settings can sometimes resolve issues related to configuration changes or accidental modifications. However, this will erase any custom BIOS settings you have made.
Q: Is it safe to disable Secure Boot?
A: Disabling Secure Boot can potentially expose your system to security vulnerabilities. Only disable it if you are certain it is causing the issue and understand the associated risks.
Tips for Preventing Future Issues:
- Regularly update the BIOS firmware: Keep the BIOS up to date with the latest version released by the manufacturer to ensure optimal performance and compatibility.
- Avoid unnecessary BIOS configuration changes: Unless you are confident in your understanding of BIOS settings, avoid making unnecessary modifications.
- Keep the system clean and free from dust: Dust accumulation can lead to hardware malfunctions, potentially affecting BIOS access.
- Monitor system health: Regularly check for hardware errors and address any issues promptly to prevent further complications.
Conclusion: Navigating the Path to BIOS Access
The inability to access the BIOS during Windows 11 startup can be a frustrating experience, but it is not insurmountable. By understanding the underlying causes and employing the outlined troubleshooting strategies, users can effectively address the issue and regain access to their system’s BIOS setup. Remember to approach the problem systematically, starting with basic steps and gradually progressing to more advanced solutions. If all else fails, seeking professional assistance can provide the necessary expertise to resolve the issue and restore full functionality to your computer.


Closure
Thus, we hope this article has provided valuable insights into Navigating the Labyrinth: When Windows 11 Fails to Boot into BIOS. We thank you for taking the time to read this article. See you in our next article!