
Unlocking Taskbar Clarity: A Comprehensive Guide to Disabling Window Grouping in Windows 11
Related Articles: Unlocking Taskbar Clarity: A Comprehensive Guide to Disabling Window Grouping in Windows 11
Introduction
With enthusiasm, let’s navigate through the intriguing topic related to Unlocking Taskbar Clarity: A Comprehensive Guide to Disabling Window Grouping in Windows 11. Let’s weave interesting information and offer fresh perspectives to the readers.
Table of Content
- 1 Related Articles: Unlocking Taskbar Clarity: A Comprehensive Guide to Disabling Window Grouping in Windows 11
- 2 Introduction
- 3 Unlocking Taskbar Clarity: A Comprehensive Guide to Disabling Window Grouping in Windows 11
- 3.1 Understanding Taskbar Grouping: The Rationale and Its Impact
- 3.2 Enabling Taskbar Clarity: Disabling Window Grouping
- 3.3 Exploring the Benefits of Disabling Taskbar Grouping
- 3.4 Potential Drawbacks and Considerations
- 3.5 FAQs Regarding Disabling Taskbar Grouping
- 3.6 Tips for Optimizing Taskbar Usage
- 3.7 Conclusion
- 4 Closure
Unlocking Taskbar Clarity: A Comprehensive Guide to Disabling Window Grouping in Windows 11

The Windows taskbar, a familiar fixture for decades, has undergone a transformation in Windows 11. While the design refresh aimed to modernize the user experience, one of its features, automatic window grouping, has sparked debate among users. Some find it intuitive, while others perceive it as an unnecessary hindrance to their workflow. This article delves into the nuances of disabling window grouping in Windows 11, exploring its implications, benefits, and potential drawbacks.
Understanding Taskbar Grouping: The Rationale and Its Impact
Taskbar grouping, a feature introduced in earlier Windows versions, aimed to simplify the taskbar by consolidating multiple windows from the same application into a single icon. When a user hovers over this icon, a thumbnail preview of each grouped window appears, allowing them to quickly switch between them. While this approach can be beneficial for managing a large number of open windows, it can also lead to confusion and inefficiency.
The primary concern with taskbar grouping arises when users have multiple instances of the same application open, each performing distinct tasks. For example, a web developer might have several Chrome windows open, each dedicated to different projects. In this scenario, grouping these windows into a single icon obscures their individual purpose. It becomes challenging to identify the specific window containing the desired project without navigating through the thumbnail previews, potentially leading to wasted time and frustration.
Enabling Taskbar Clarity: Disabling Window Grouping
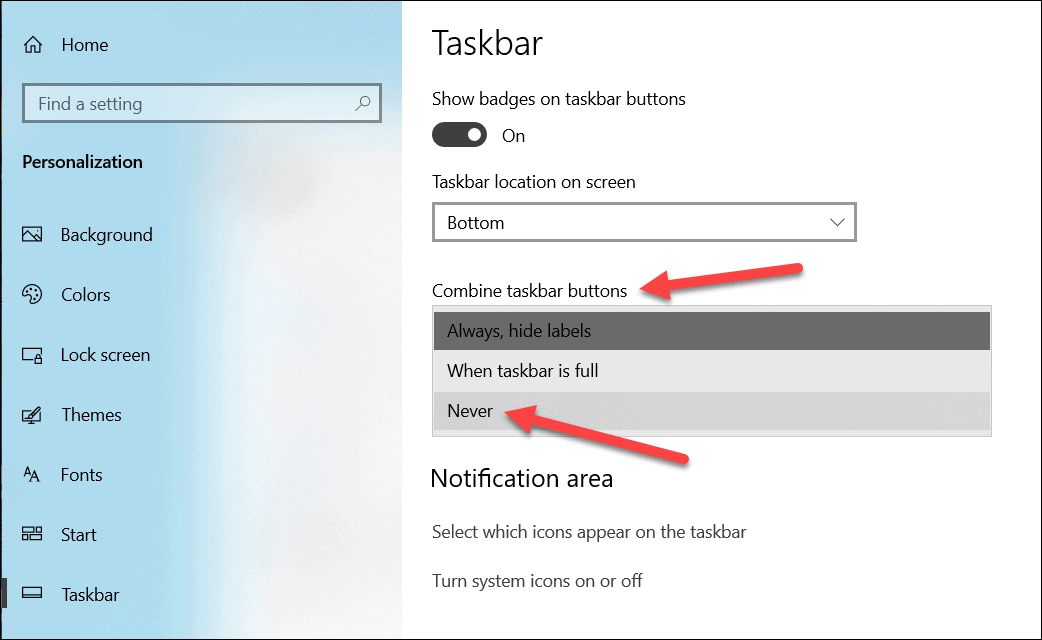
For users who prioritize individual window identification and control, disabling taskbar grouping offers a more streamlined experience. Windows 11 provides a straightforward method for accomplishing this.
- Accessing the Settings: Open the Windows Settings app by pressing the Windows Key + I.
- Navigating to Personalization: Click on the Personalization option.
- Taskbar Settings: Select Taskbar from the left-hand menu.
- Disabling Grouping: Locate the Taskbar Alignment section and toggle off the switch labeled Combine taskbar buttons.
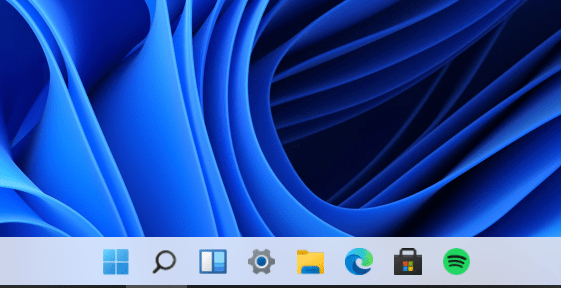
Once disabled, individual icons for each open window will appear on the taskbar, eliminating the need to navigate through grouped thumbnails. This enhanced clarity allows users to quickly identify and access the specific window they need, improving efficiency and reducing potential confusion.
Exploring the Benefits of Disabling Taskbar Grouping
Disabling taskbar grouping offers several advantages, particularly for users who prioritize individual window management:
- Improved Window Identification: By displaying individual icons for each open window, users can readily identify the specific window they need, eliminating the need to hover over a grouped icon and navigate through thumbnail previews. This streamlined process saves time and reduces frustration.
- Enhanced Workflow Efficiency: The ability to quickly locate and access the desired window directly from the taskbar contributes to a more efficient workflow, especially when working with multiple applications or instances of the same application.
- Reduced Cognitive Load: Navigating through grouped thumbnails can create cognitive overload, especially when dealing with a large number of open windows. By displaying individual icons, users can focus on their tasks without the distraction of deciphering grouped representations.
- Increased Control: Disabling grouping provides users with greater control over their workspace by allowing them to visually differentiate and manage individual windows effectively.
Potential Drawbacks and Considerations
While disabling taskbar grouping offers significant advantages, it’s essential to acknowledge potential drawbacks and consider individual preferences:
- Increased Taskbar Clutter: Disabling grouping can lead to a more cluttered taskbar, especially when working with a large number of applications. This can become visually overwhelming for some users, particularly those with smaller screen resolutions.
- Limited Screen Real Estate: A cluttered taskbar can consume valuable screen real estate, potentially impacting the available space for other elements on the screen.
- Potential for Confusion: For users accustomed to taskbar grouping, the initial transition to individual icons might feel disorienting. However, this can be mitigated by gradually adjusting to the new layout.
FAQs Regarding Disabling Taskbar Grouping
Q: Can I customize the appearance of the taskbar when grouping is disabled?
A: Yes, Windows 11 offers various customization options for the taskbar, including the ability to change its size, color, and alignment. These settings are independent of the grouping feature.
Q: Does disabling grouping affect the functionality of the taskbar?
A: No, disabling grouping only affects the visual representation of open windows on the taskbar. All other taskbar functionalities, such as the system tray, search bar, and pinned applications, remain unaffected.
Q: Can I selectively disable grouping for specific applications?
A: Unfortunately, Windows 11 does not currently offer the ability to selectively disable grouping for individual applications. The setting applies globally to all applications.
Q: What are some alternatives to disabling taskbar grouping?
A: Users who prefer a less cluttered taskbar but still find value in grouping can explore alternative methods such as:
- Using Task Manager: Task Manager provides a comprehensive view of all running applications, allowing users to easily switch between them.
- Utilizing Keyboard Shortcuts: Windows offers keyboard shortcuts for switching between open windows, eliminating the need to rely solely on the taskbar.
- Exploring Third-Party Taskbar Enhancements: Several third-party tools offer advanced taskbar customization options, including the ability to control grouping behavior.
Tips for Optimizing Taskbar Usage
- Utilize Taskbar Icons: Pin frequently used applications to the taskbar for quick access.
- Experiment with Taskbar Alignment: Explore different taskbar positions (top, bottom, left, or right) to find the most comfortable arrangement.
- Customize Taskbar Size: Adjust the taskbar size to suit your preferences and screen resolution.
- Explore Taskbar Customization Options: Utilize the available settings to tailor the taskbar to your specific needs.
Conclusion
Disabling taskbar grouping in Windows 11 offers a streamlined approach to managing open windows, enhancing clarity, and improving workflow efficiency. While potential drawbacks exist, the benefits of individual window identification and control outweigh these concerns for many users. By understanding the implications of this feature, users can make informed decisions about their taskbar settings, tailoring their Windows experience to their specific preferences and workflow requirements. Ultimately, the choice between enabling or disabling taskbar grouping rests with the individual user, based on their priorities and how they interact with their digital workspace.


Closure
Thus, we hope this article has provided valuable insights into Unlocking Taskbar Clarity: A Comprehensive Guide to Disabling Window Grouping in Windows 11. We appreciate your attention to our article. See you in our next article!